Collecting email addresses or phone numbers should be a fundamental part of your online marketing tactics. When you have something new to share with your prospects, leads you collected before will give you a vast opportunity to share your new products. You can send an email or SMS to your subscriber’s list with your offers.
One easy way to collect the user’s email or phone is to use Facebook Messenger. You can collect user’s email, phone, and other data by using ChatPion on Facebook Messenger. Offer prospects a free report or guide, and ask them for their email address or phone number. Create a Web View form or Quick Reply to collect their email or phone number. Also, you can use ChatPion’s special feature “User Input Flow and Custom Field (A ChatPion Add-on)” to collect users’ data.
Quick Reply:
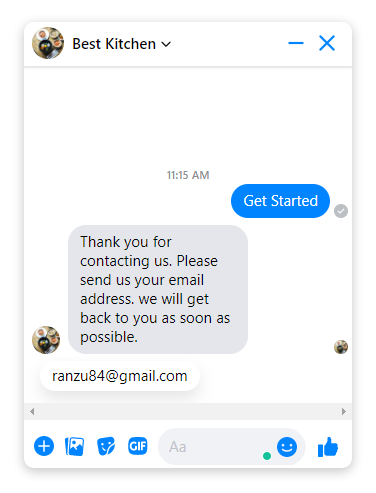
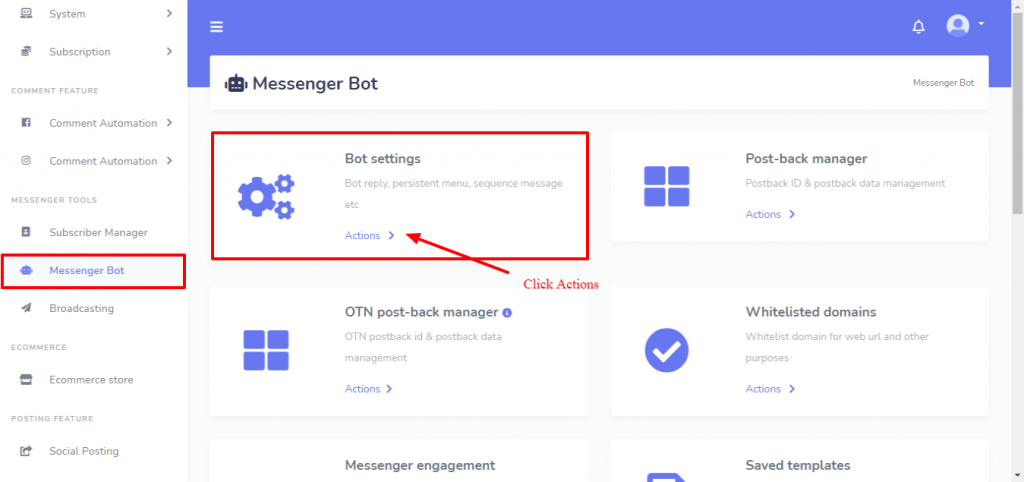
Quick Reply can be started in 2 ways on the Messenger bot. We can trigger a bot for Quick Reply from a keyword-based reply or Get started Template. For a keyword-based Quick Reply go to Messenger Bot > Bot Settings > Actions
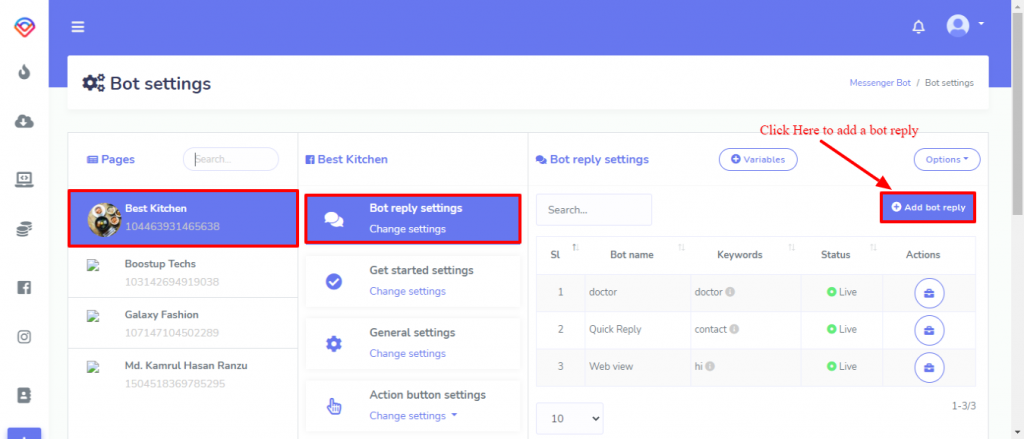
Select your Facebook Page and by default, it’s on Bot reply settings, click on the Add bot reply button to create a bot.
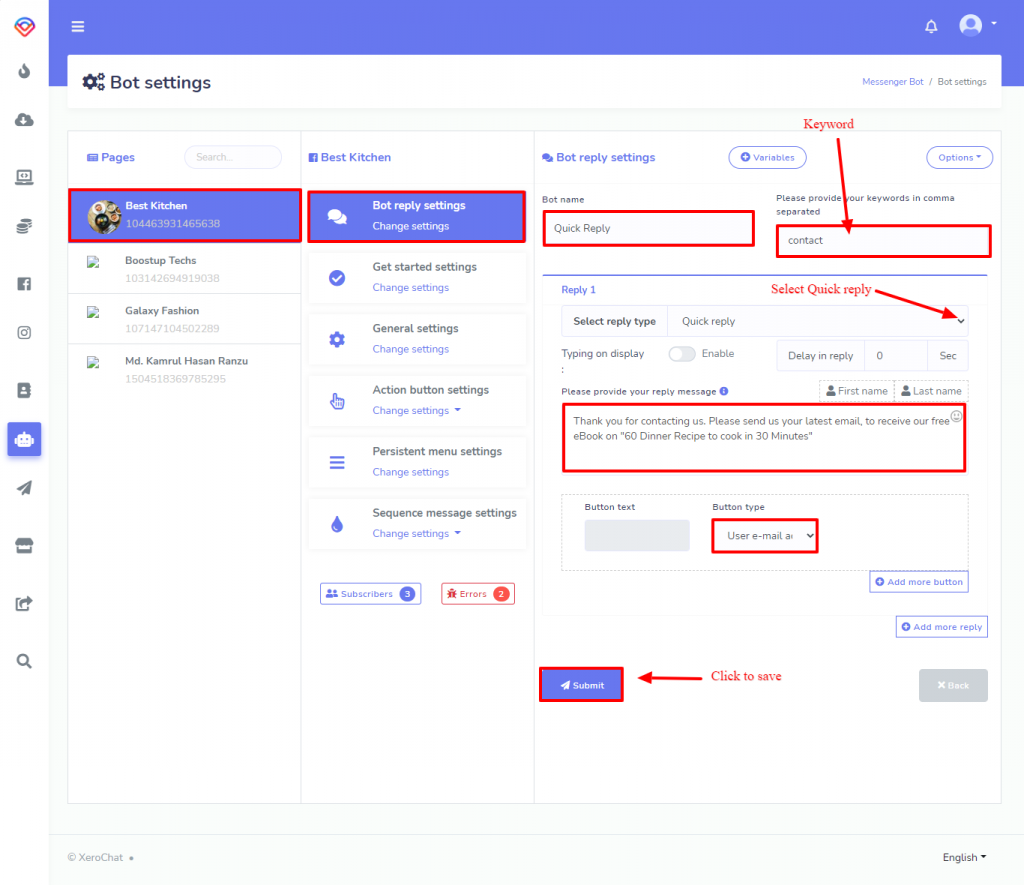
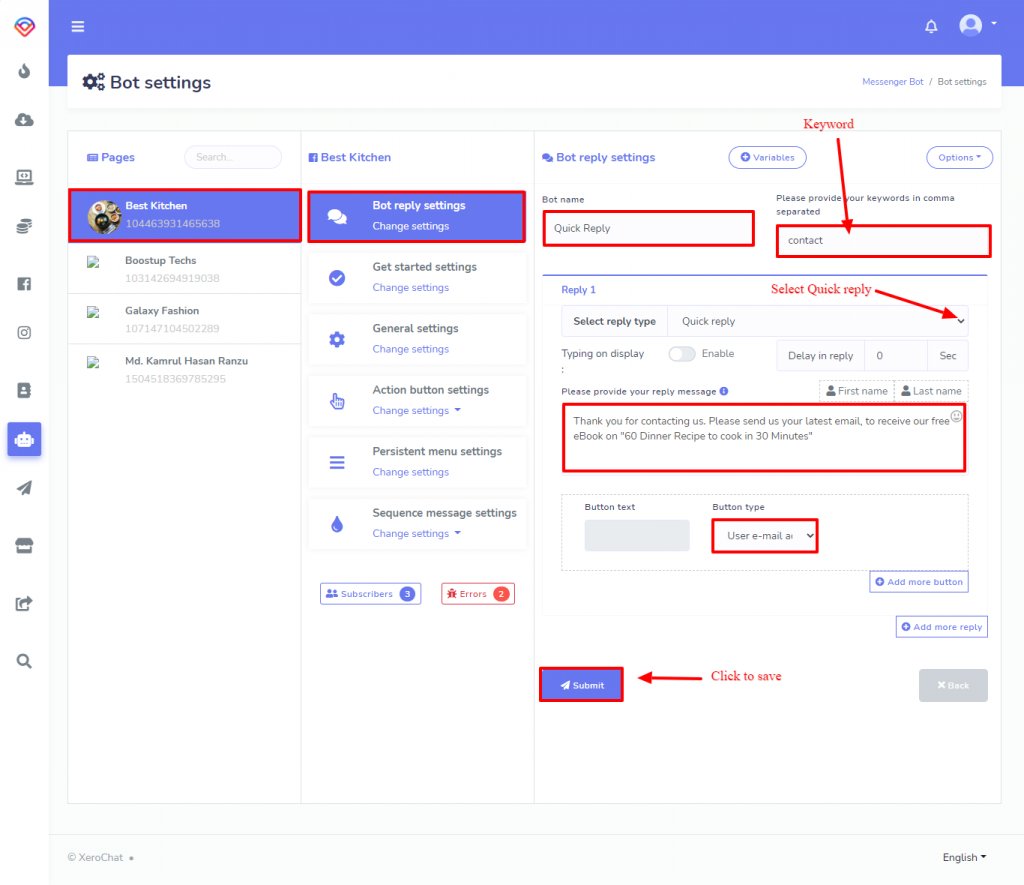
When you click on Add bot reply Button an interface to create a bot will appear. Give a name for the bot and put your keywords separated by a comma, and then select “Quick reply” from the dropdown list. Write your reply message on the respective form field and then select the button type as “User e-mail address” for email and “User’s phone number” to collect the phone number from the user. Finally hit the Submit button to save the bot reply.
For a Get started Quick reply, we need to start from the “Get Started” template to create the Quick Reply and then enable the “Get Started” Button from the setting.
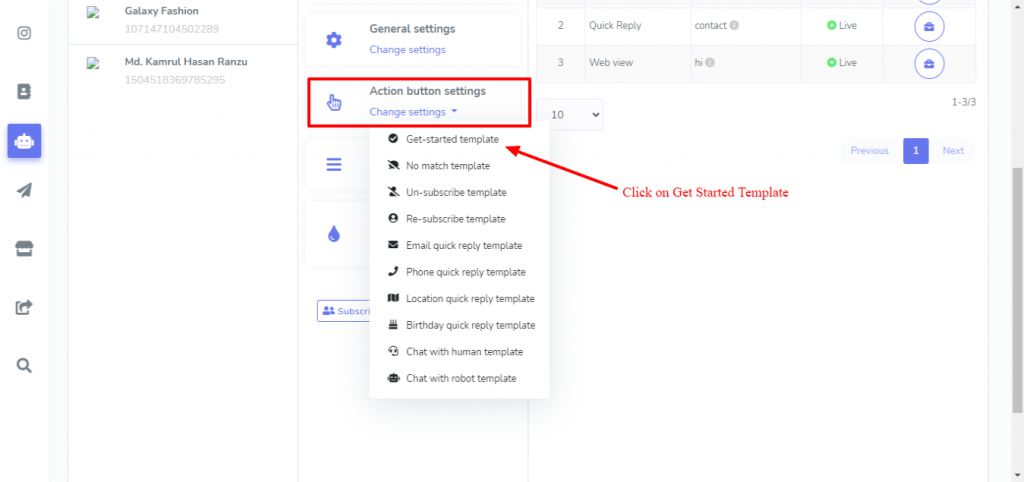
To create a “Get Started” Template for Quick reply from Bot Settings (Messenger Bot > Bot Setting > Actions), Click on Action Button Setting > Get-started Template
Then fill out the Template, just the way we did for a keyword-based Quick Reply. The difference is, we don’t need to put any keywords here and we don’t need to put a bot name here.
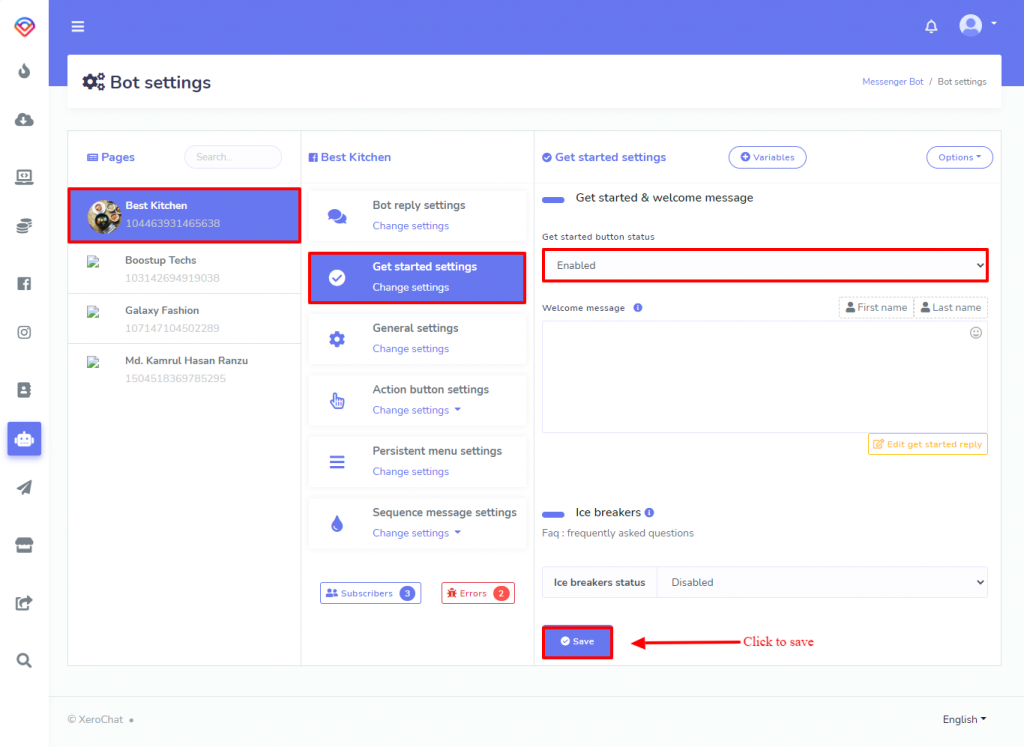
Now we need to enable the Get Started Template. From the Bot settings (Messenger Bot > Bot Setting > Actions), go to Get Started Settings and then set the Get Started Button status to “Enabled”.
Web View:

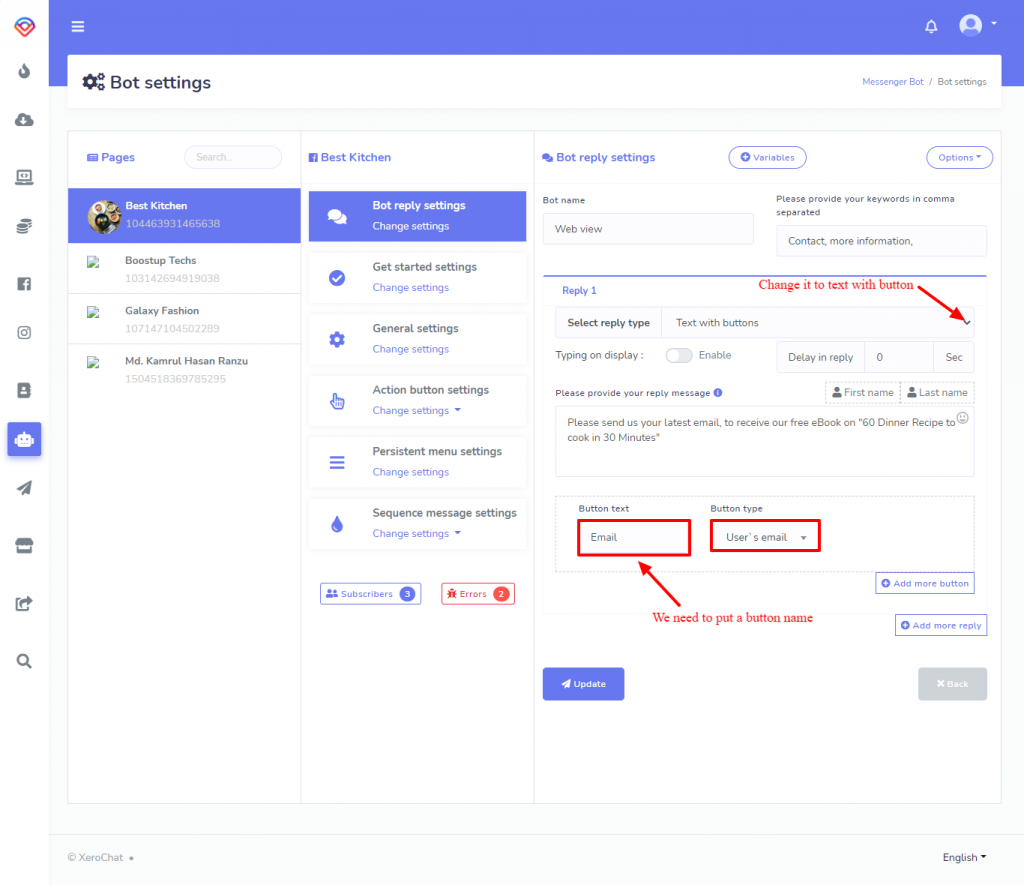
The process of Creating a Web View is almost the same as Quick Reply, the difference is, we just need to change the Reply type to “Text with Button” and put a button name. As shown below:
User Input Flow & Custom Field:
(needs “User Input Flow & Custom Field”, a ChatPion Add-on)
Quick Reply and Web View can only collect users Email and Phone numbers, but User Input Flow & custom field can collect any kind of information from the user. We can use this Add-on to collect email, phone number, name, age, audio, video, date, time, and anything we want. Besides, we can create a multiple-choice question for the user. And also, we can give an option to skip a question that they don’t want to answer.
To create a User Input Flow, go to Messenger Bot > User Input Flow & Custom Field > Actions > User Input Flow
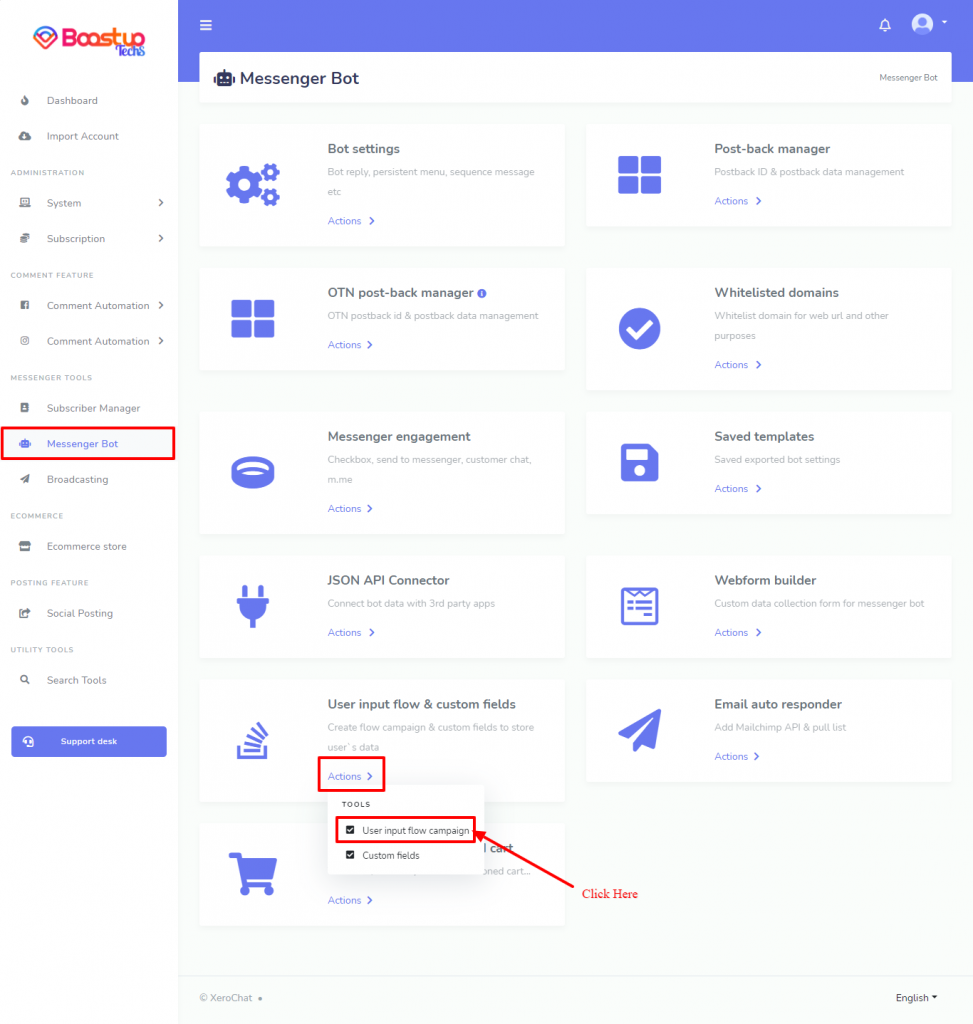
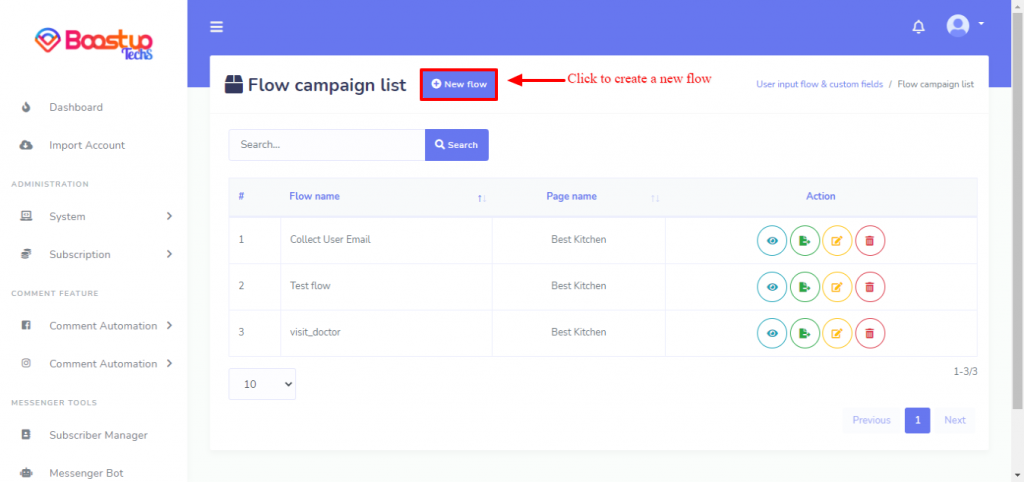
As soon as you click on User Input Flow, an interface with existing Flow will appear, in the left side there is a button named New Flow, click on this button to create a flow.
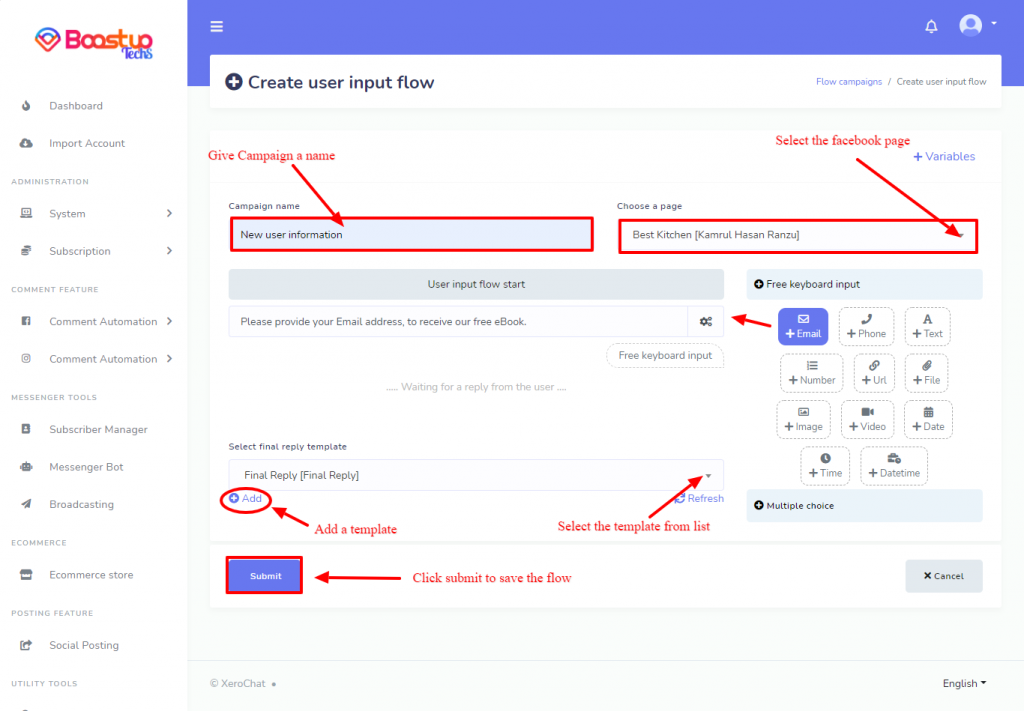
Give a name for the flow, and then select the Facebook page for which you will create the flow. Then select a question type and click to add a question. Write the question.
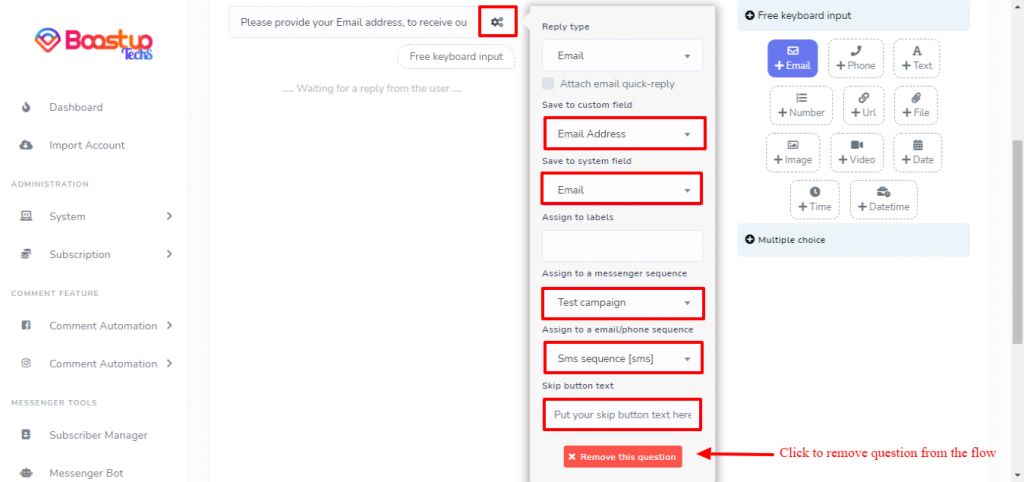
With every question there is a settings button, on the settings we can change the reply type, can change the system field or custom field where we want to save the lead. Also, we can assign it to the existing Email/Sms or Messenger sequences.
To know all the benefits of User Input Flow and Custom Field you can read my blog from here.
1 comment
I love it when folks get together and share thoughts. Great blog, keep it up!