Social media marketing is now a very common practice among entrepreneurs and businesses. Instagram is one of the most used social media for marketing. Posting on Instagram and replying to comments on Instagram takes a lot of time. Automation of Instagram posting and comments reply can save a lot of time. XeroIni, a piece of software that can help to fully automate Instagram marketing.
By using XeroIni we can create a scheduled post, repost the scheduled post with a time interval. We can reply to comments or automatically comment on the post by creating campaigns. We will see how to use the XeroIni to get the most out of it.
Instagram Posting:
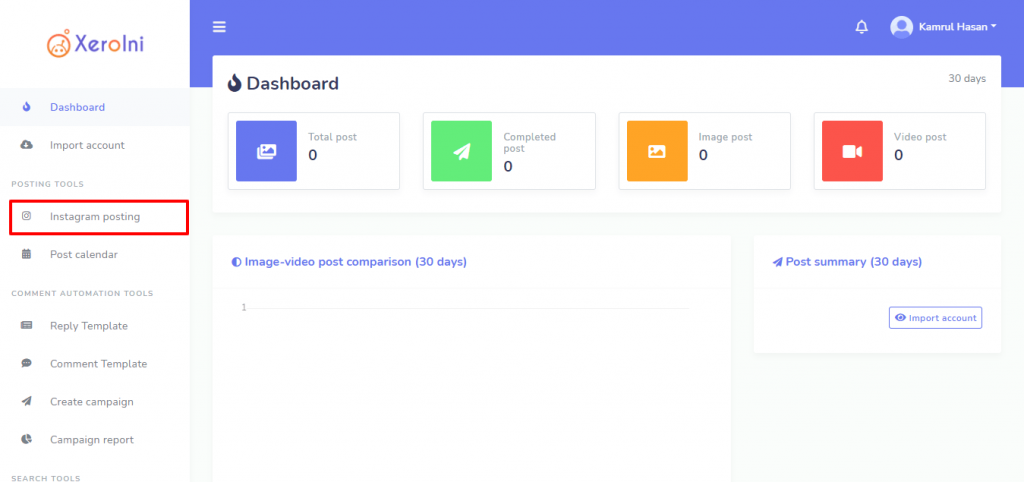
On the dashboard of the XeroIni, we can see a navigation menu on the left side. From the left navigation menu Click on the “Instagram Posting”.
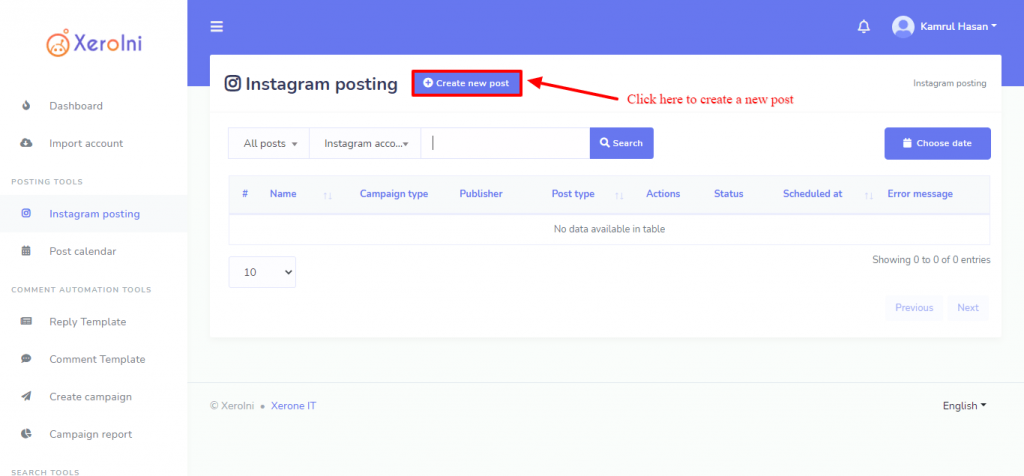
As soon as you click on Instagram posting, an interface to create an Instagram post will appear. Click on the “Create new post” button.
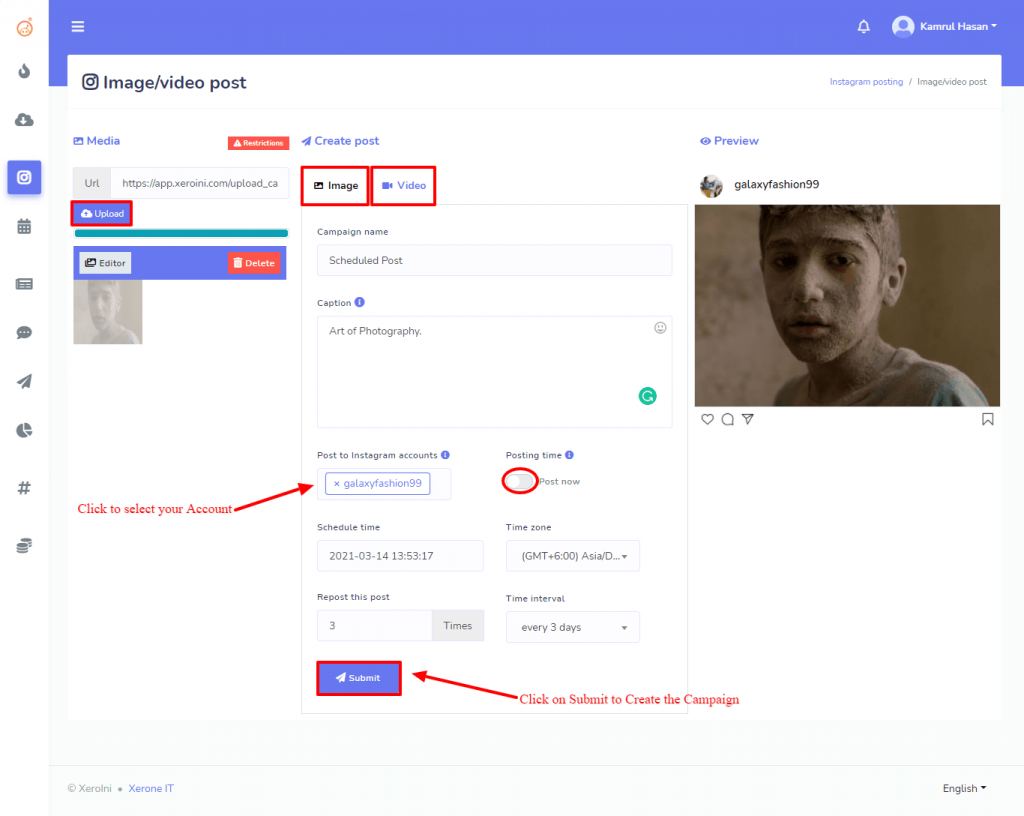
We can create two types of posts on Instagram, Image, and Video. Click on the Image tab for Image post and Video tab for video post. Click on the upload button to upload the Image for Video. Give a campaign name and the caption for the post on the respective field. Then select your Instagram account and select the posting time. We can just publish the post or create the post schedule. For a scheduled post, select the scheduled time from the calendar, select your time zone. If you want to repost it then put the number Repost Times and the time interval. Click on the submit button to save the campaign.
Instagram Auto Comment:
XeroIni can automatically comment on posts. We just need to set up the campaign for Auto Comment. To create an Auto Comment campaign, we need to create an Auto Comment Template first. From the left navigation menu click on “Comment Template”.
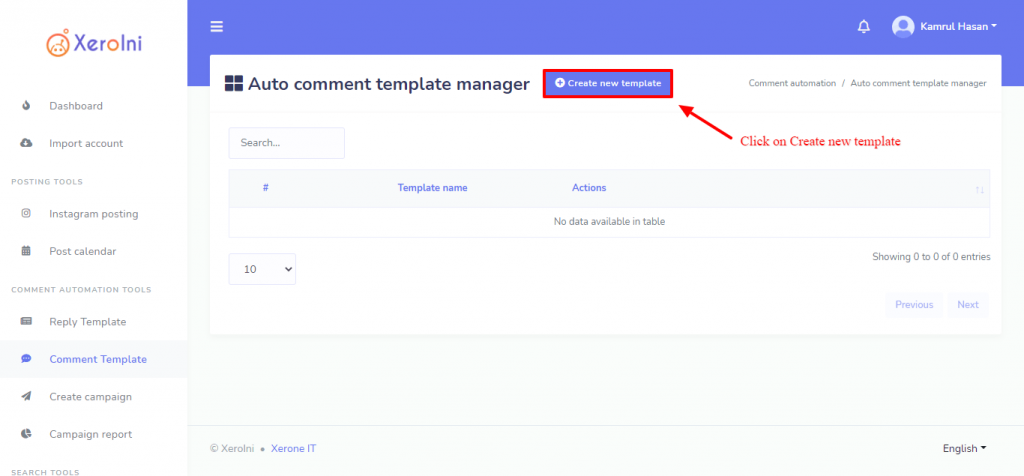
Then Click on “Create new template”
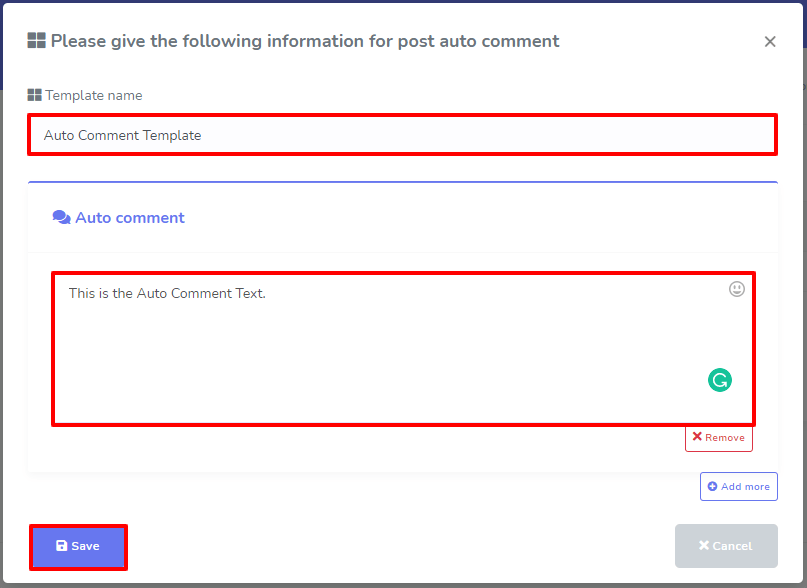
Give a Template name and write the Comment Text on the respective field and then click “Save” button.
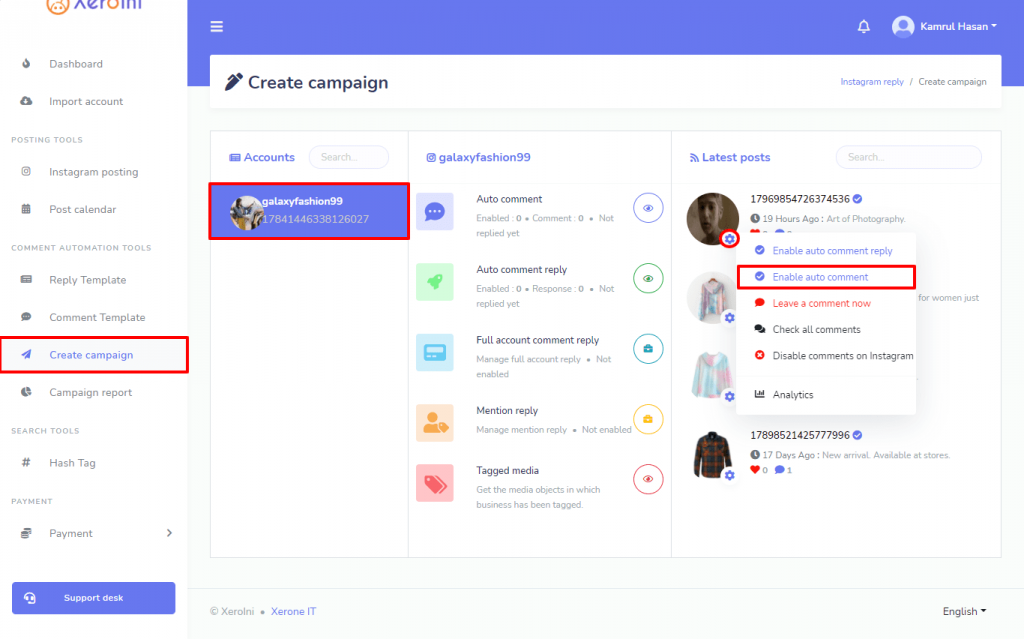
Now click on the “Create Campaign” from the navigation menu. Then select your Instagram account, a list of the Instagram post will appear on the right-hand side. Click on the Settings button of the post for which you want to enable the auto comment, click on “Enable auto comment”
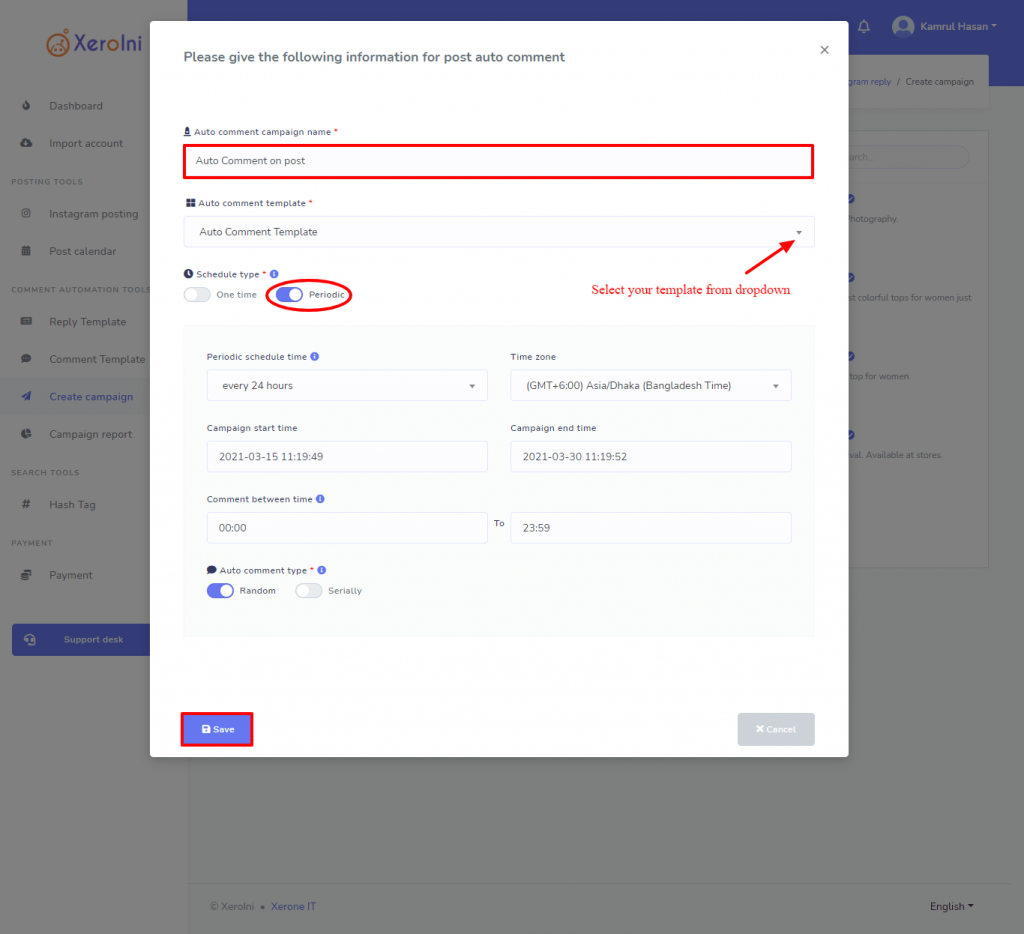
Now, put a name for Auto Comment Campaign and select the template for auto comment. After that, we need to Schedule type. There are two types of schedules we can create, one time and periodic. Select your desired type of schedule and fill up the scheduled date and time, and click on the Save button, and you are done.
Auto Comment Reply:
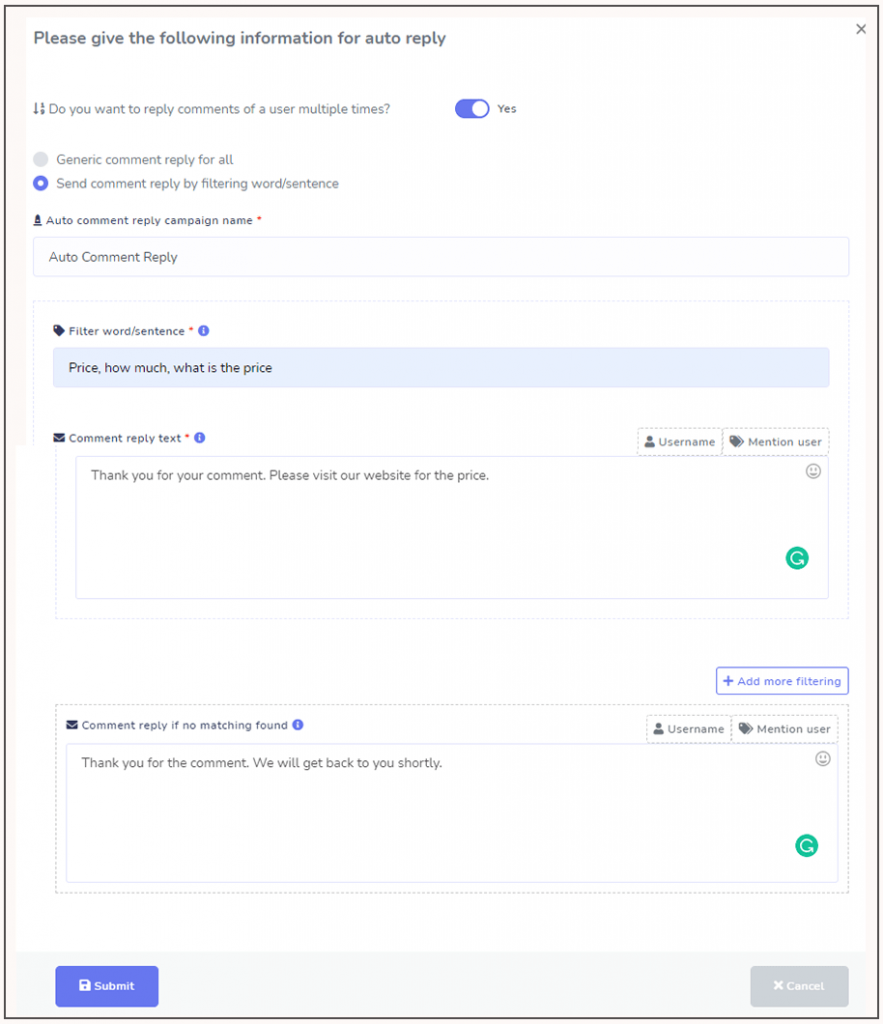
Creating “Auto Comment Reply” campaign is almost similar to “Auto Comment” Campaign. First, we need to create a Comment Reply Template and then create the campaign for Auto Comment Reply. Click on the Reply Template from the navigation menu. Then click on the “Create new template”. We can create 2 types of Comment reply: Generic Reply Template and other one is Filtering words or sentence.
Generic Reply Template will be used to reply to any comments. And the other one will filter the comment with keywords to reply.
Give a name for the Reply template. Select your desired Reply Template type, Put keywords and the Reply text, and also a Reply text when no keyword matches. And then click on save.
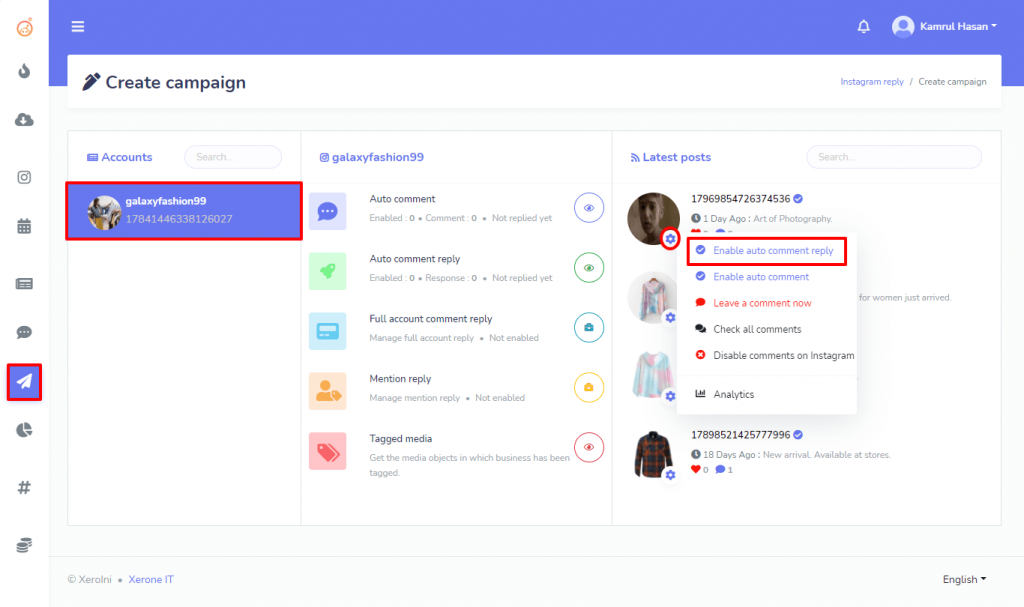
Now again go to the Create Campaign from the left navigation menu and select your Instagram account and click on the Settings button of the post you want to set the comment reply. Click on the “Enable Auto Comment Reply”.
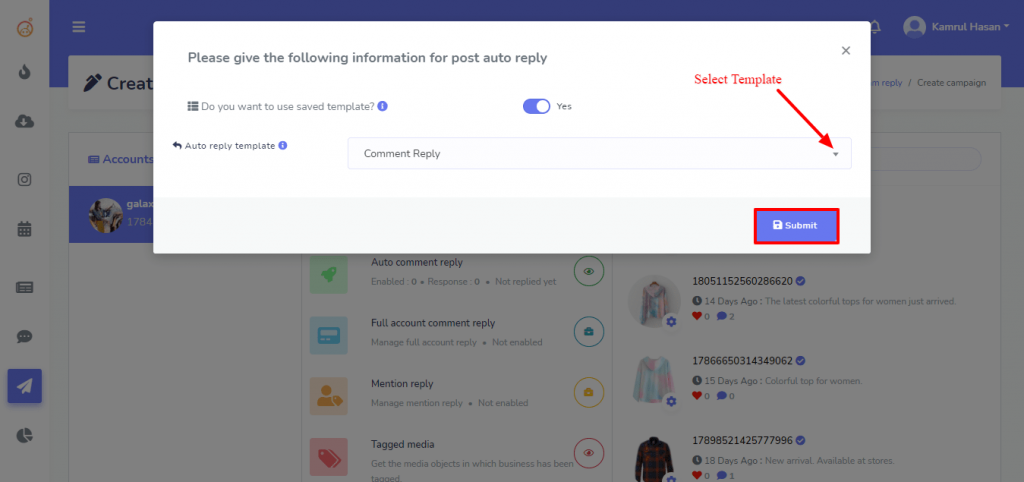
Now select the Template from the dropdown list and save the campaign.
XeroIni is a smart way for Instagram marketing. It can automatically post on behalf of you, also the automation for the comment reply can convert a comment into a lead.
