Meta has recently announced exciting news about the opening of the WhatsApp business platform to all businesses. Now a business or developer can speed up the response time to customers by using the WhatsApp business platform.
WhatsApp Cloud API allows businesses to send and receive messages using the cloud-hosted version of its WhatsApp Business API.
We will see how to create a WhatsApp cloud API and connect it to BotSailor to create a WhatsApp bot, broadcast messages, send sequence messages, and see all conversations in live chat.
To create a WhatsApp cloud API, first go to developers.facebook.com.
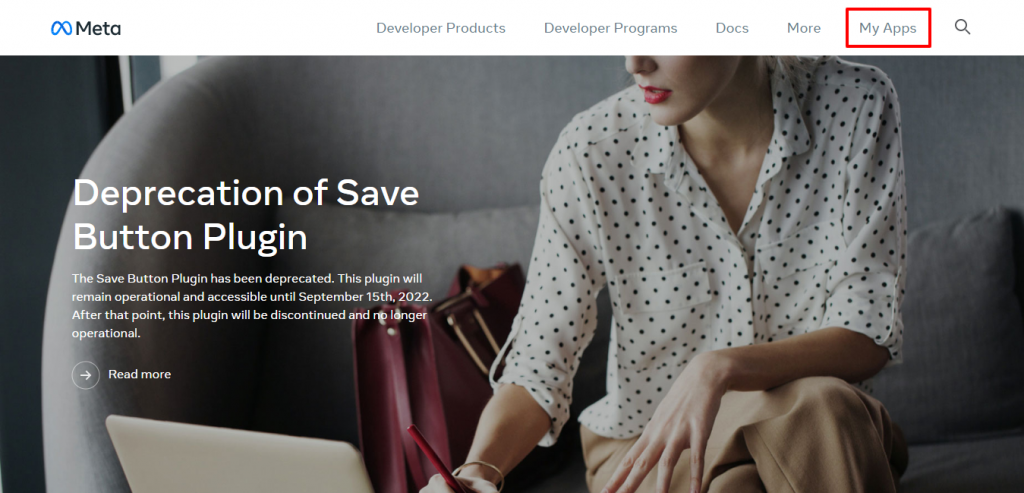
From there, click on My Apps.
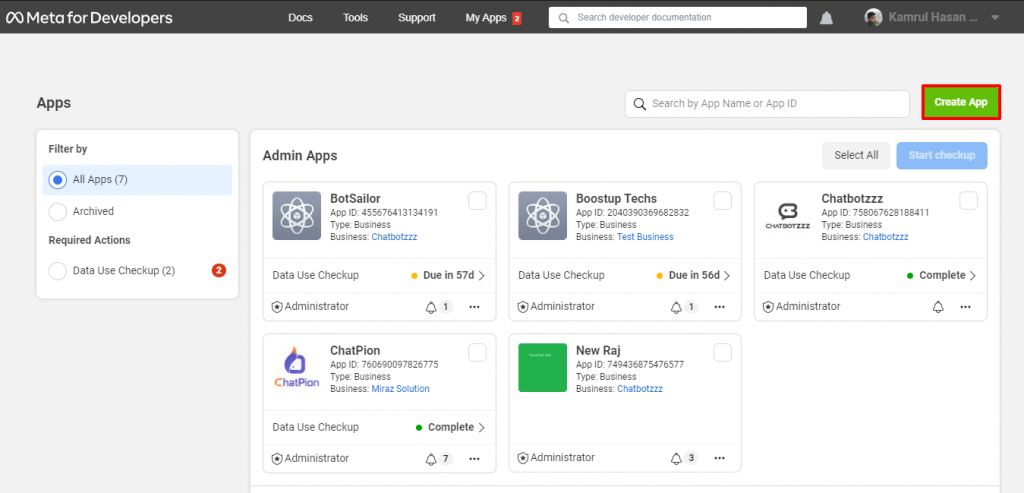
From the next page click on Create App.
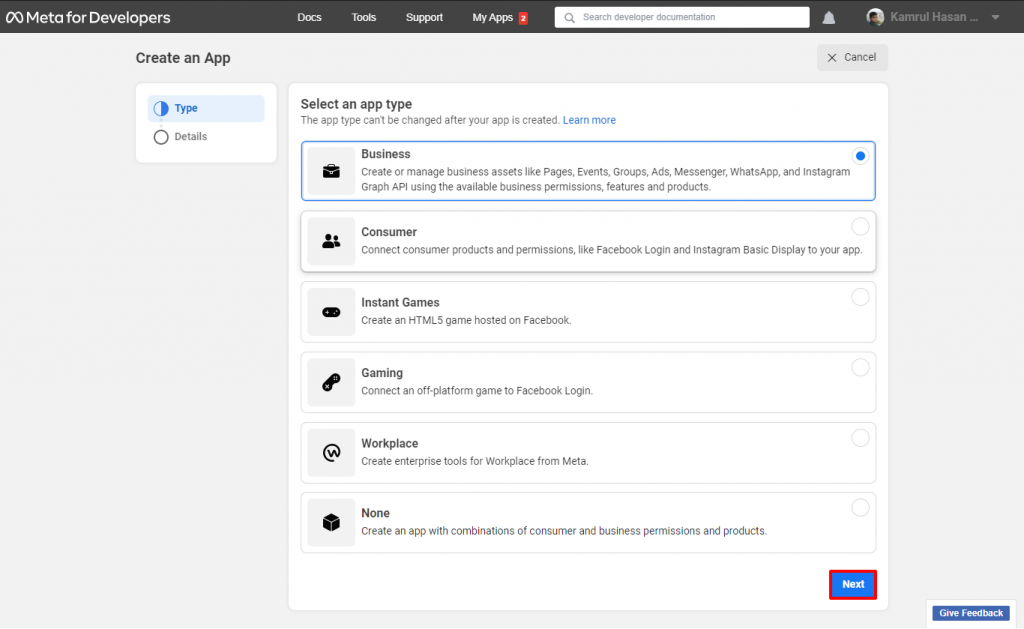
Select the App type as Business and then click the Next Button.
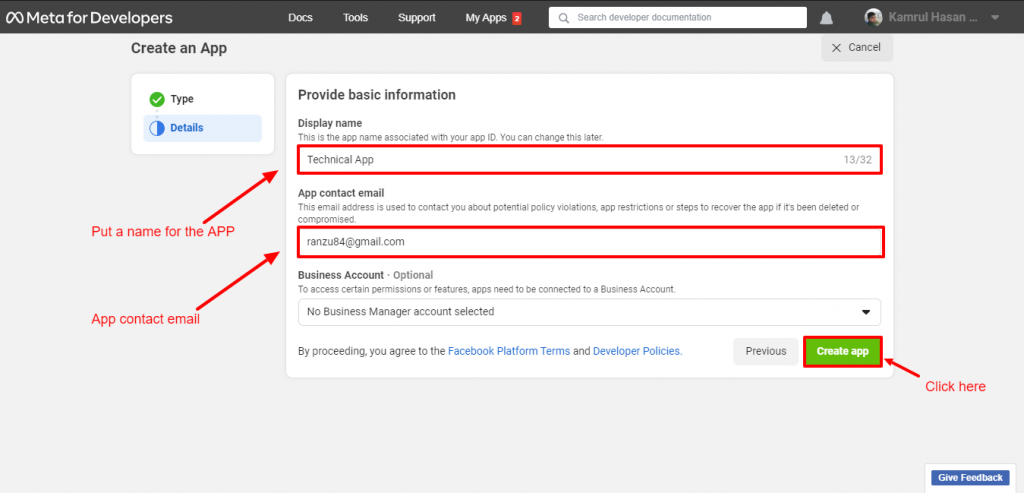
Give a display name, App contact name will be filled automatically as the primary contact email of your Facebook account. Then we need to select the business account if we have any. If we don’t have any than just keep it as it is. In the next step it will ask to create a business account.
Click on the Create App button.
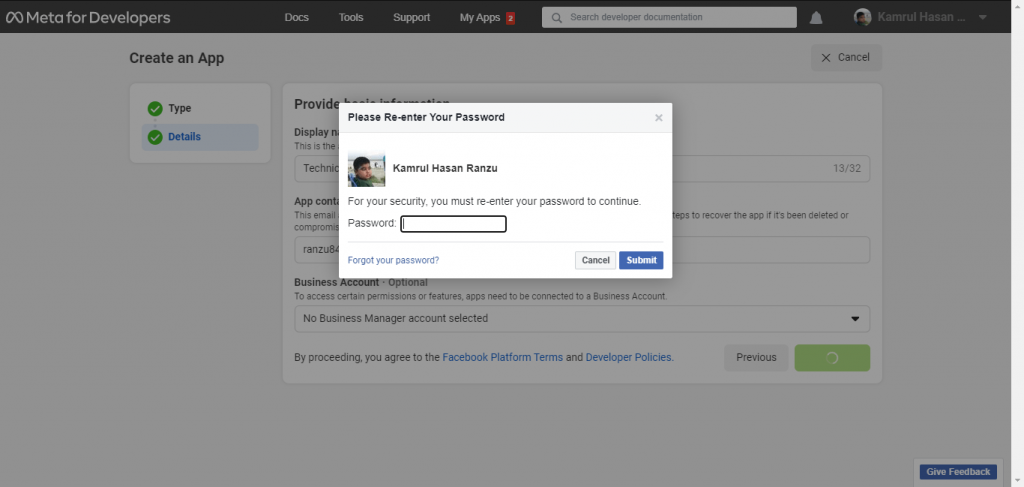
This will ask you to enter your Facebook passwords. Just enter your password and click submit.
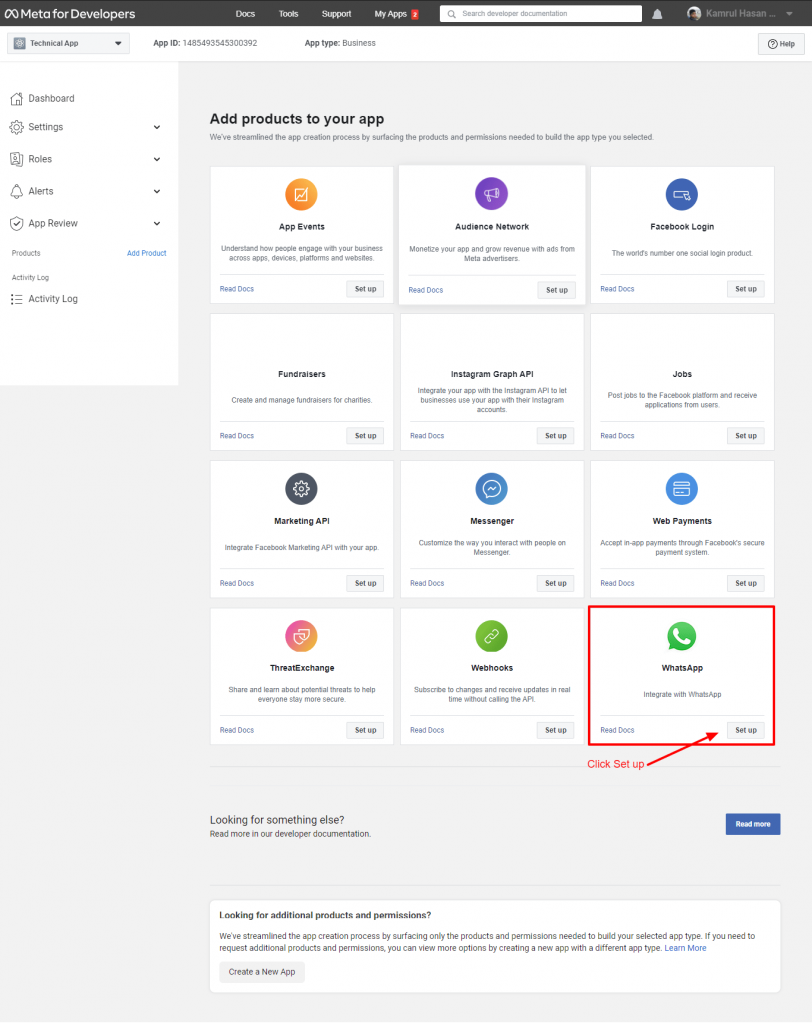
From the “add products to your app”, scroll down to find WhatsApp. Click on “Set up”.
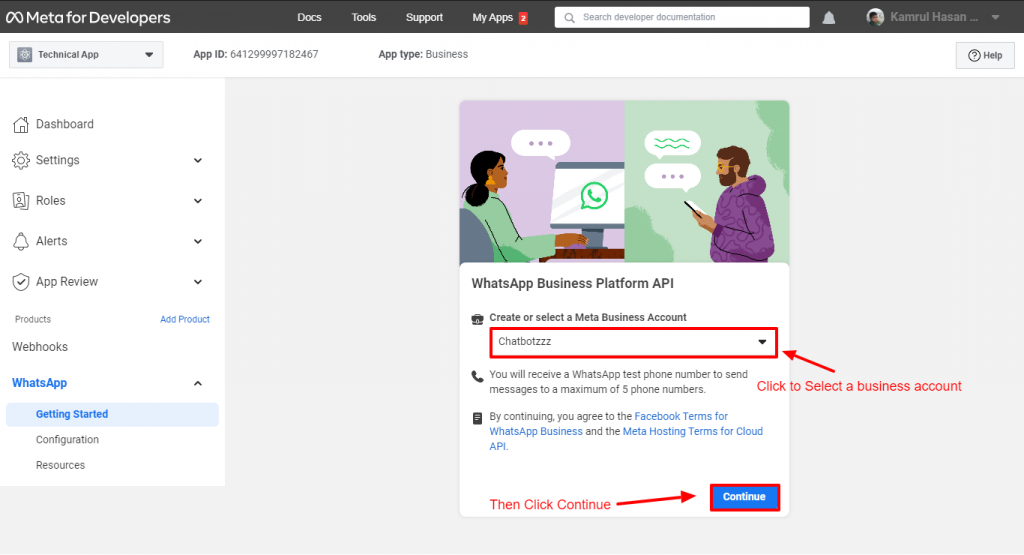
Here in this step, Facebook will again ask you to select the business account or you can select it to “Create Business Account”. If you already have a business account, select it. Otherwise, keep the “Create business account” selected.
Then, click on the next button.
In the step 1 and step 2, we don’t need to do anything. From the step 3 click on the Configure Web hooks URL.
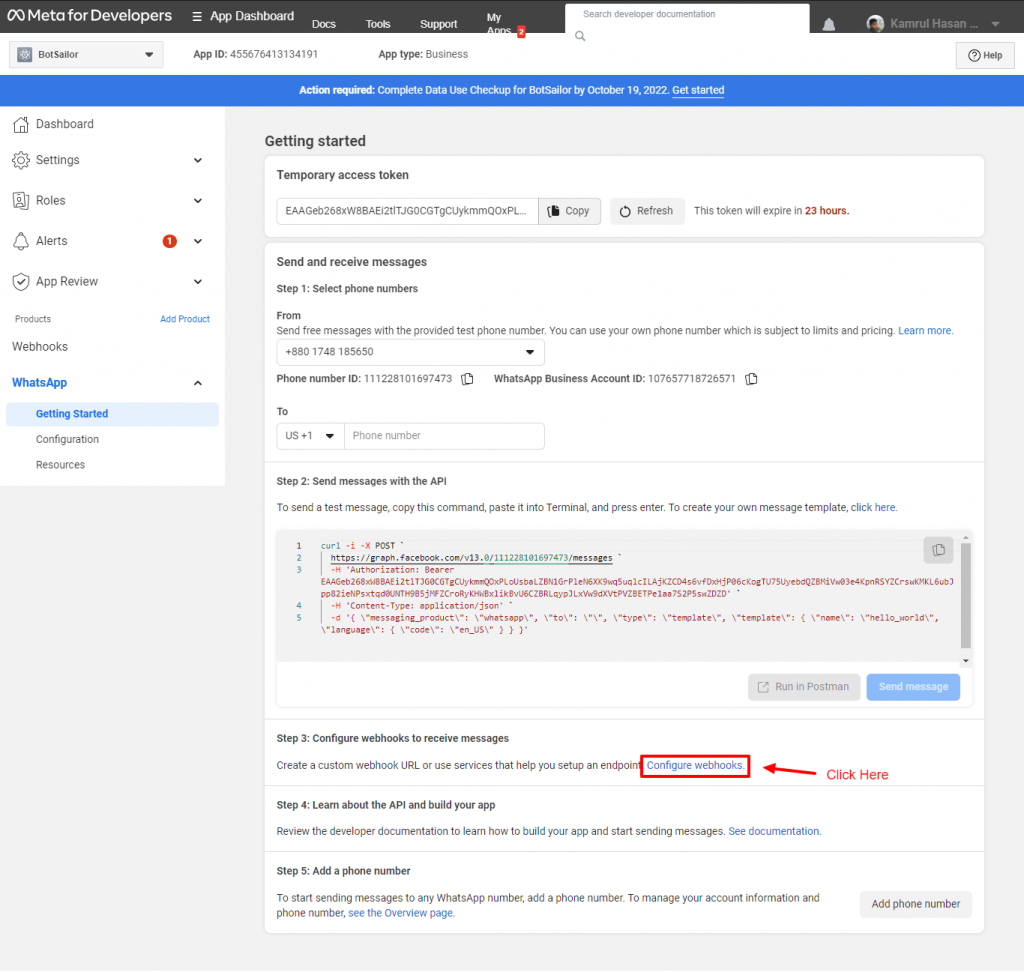
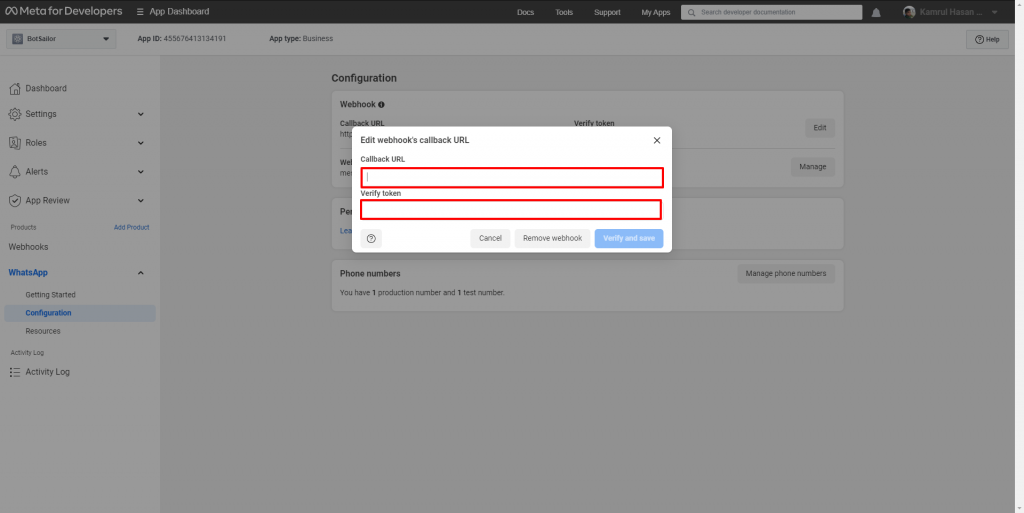
Click the Edit button from the Web hook. The Call back URL and Verify token must be entered here. These details will be obtained from BotSailor.com.
To get the “Call Back URL” and “Verify token” go to botsailor.com and then click on “Connect WhatsApp” from the left navigation menu.
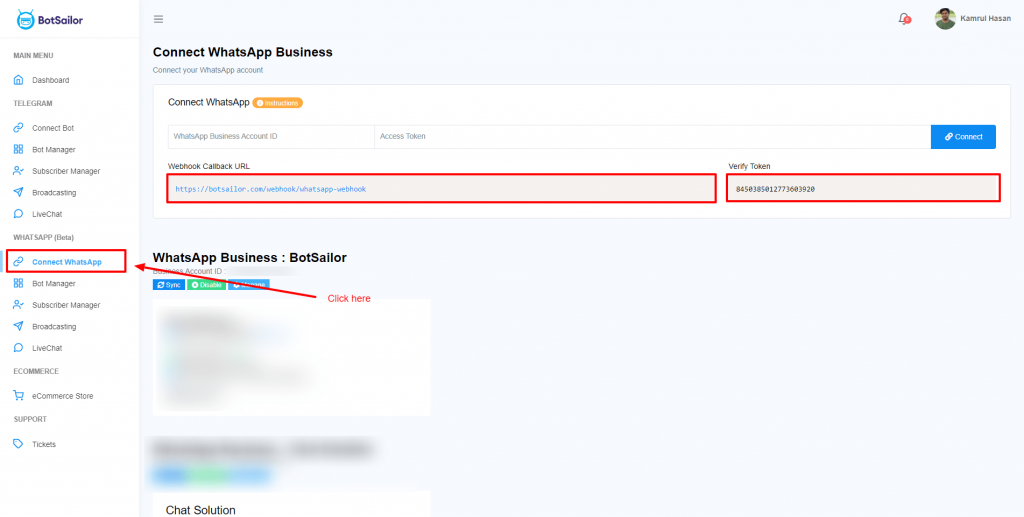
Copy the “Call Back URL” and “Verify Token” and paste on the Web hook configuration. Then click on verify and save.
After adding these information, click on manage.
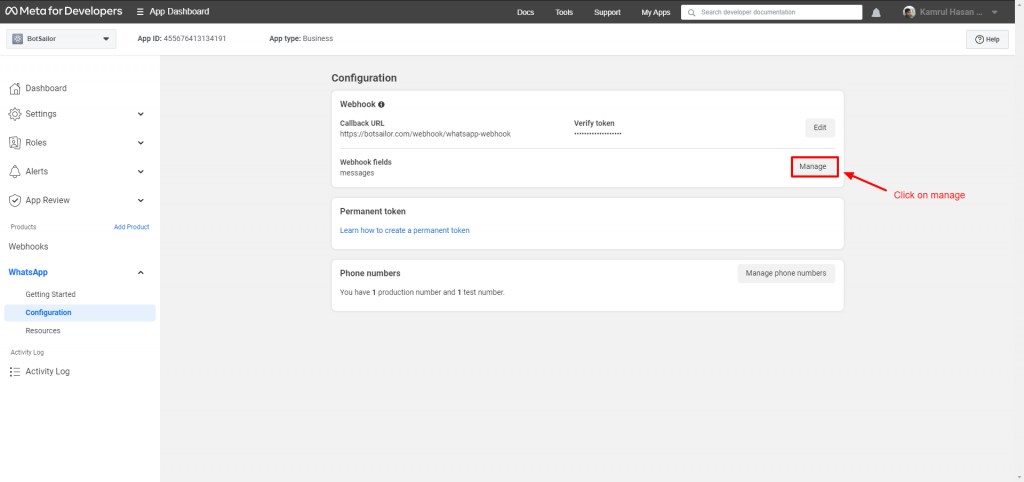
From here, subscribe to messages.
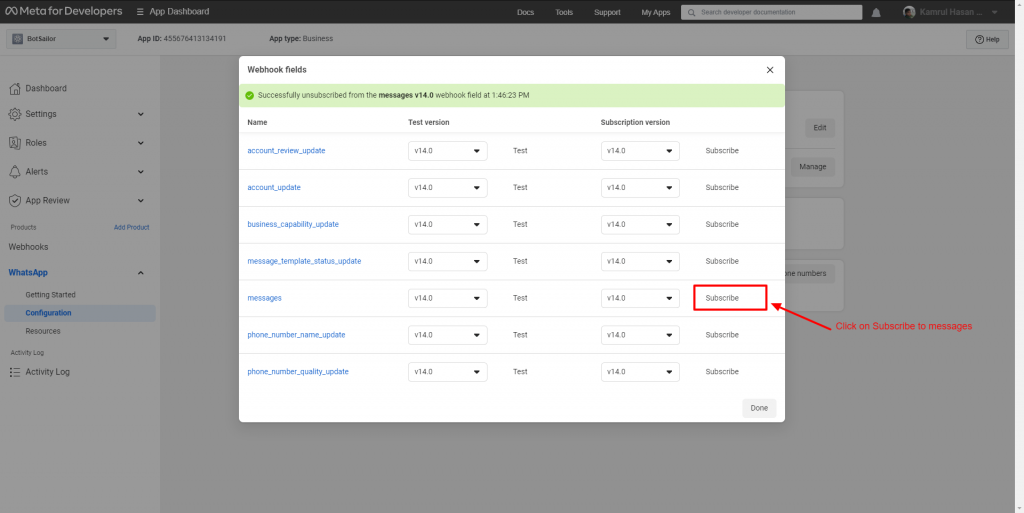
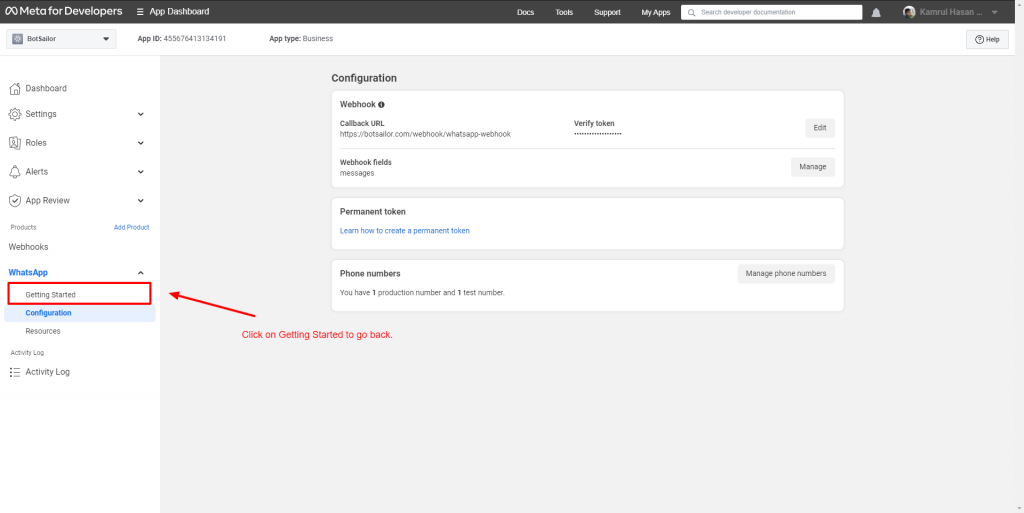
Now, go back to the getting started from the WhatsApp.
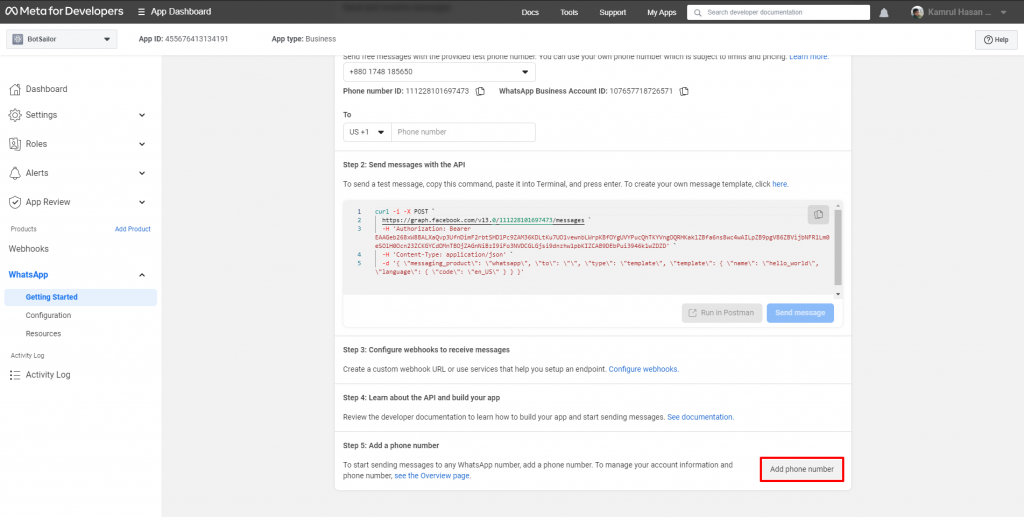
On the step 4, we don’t need to do anything. From the step 5, click on the “Add phone number” to add a phone number for the WhatsApp business account.
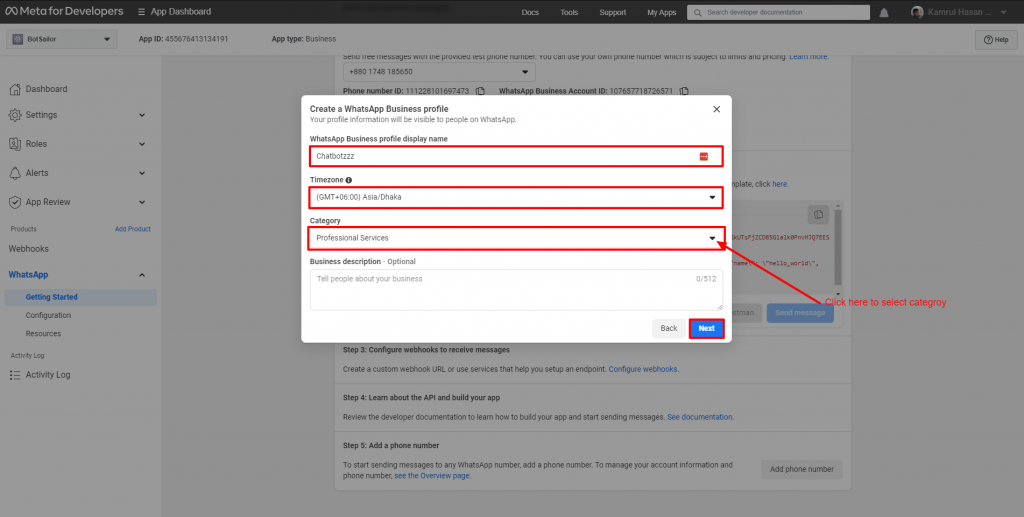
As soon as we click on the “Add Phone number”, it will ask to enter the “WhatsApp business profile display name”. This name should be reflect the name of your business. Select the time zone. Select the category of your business and then put a business descriptions. It’s not mandatory.
Then click next.
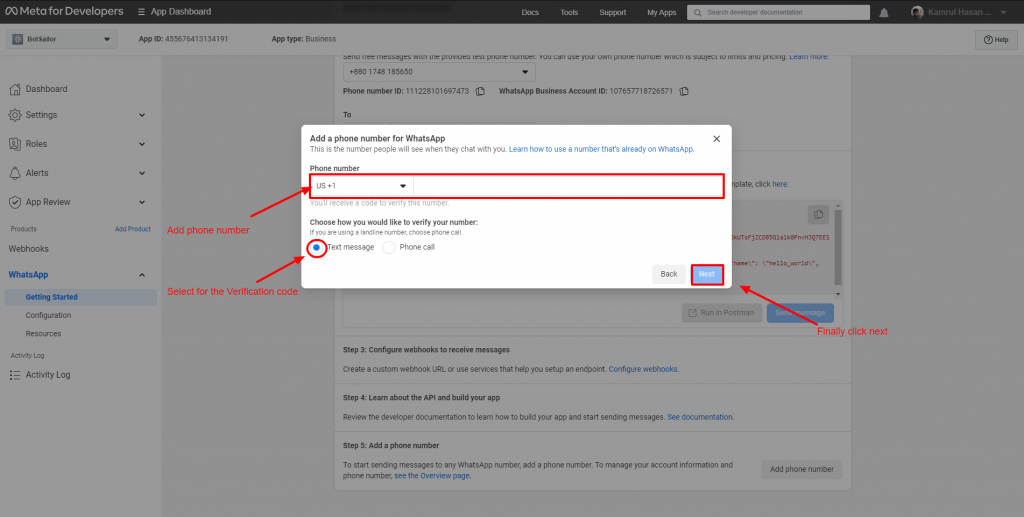
It will ask to add a phone number. Select the country code and add the number. It will ask you to select the verification method. We can receive a verification code by message or phone call. Select how you want to get the verification code. Finally click on the Next Button.
Facebook will send a verification code, enter the code and finish the verification.
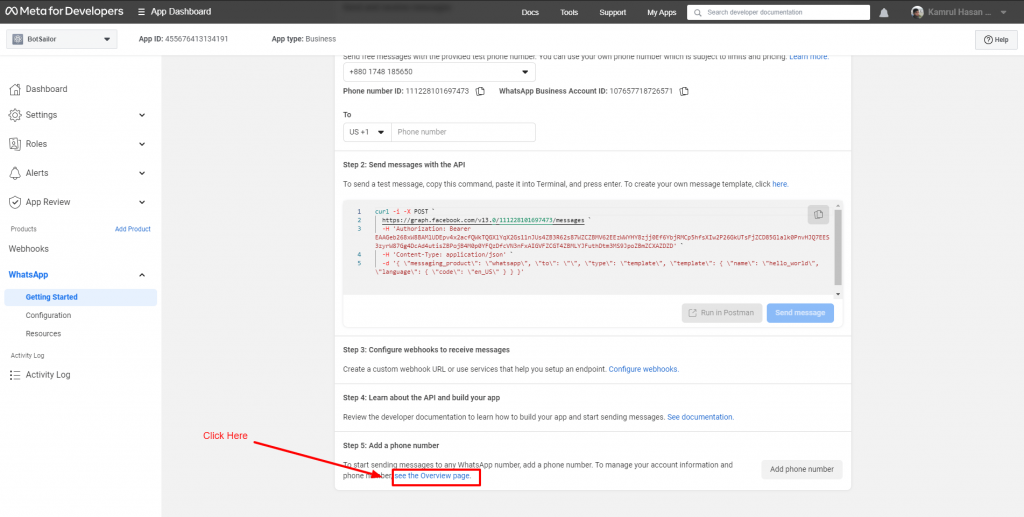
Now, click on the “see over view page” link.
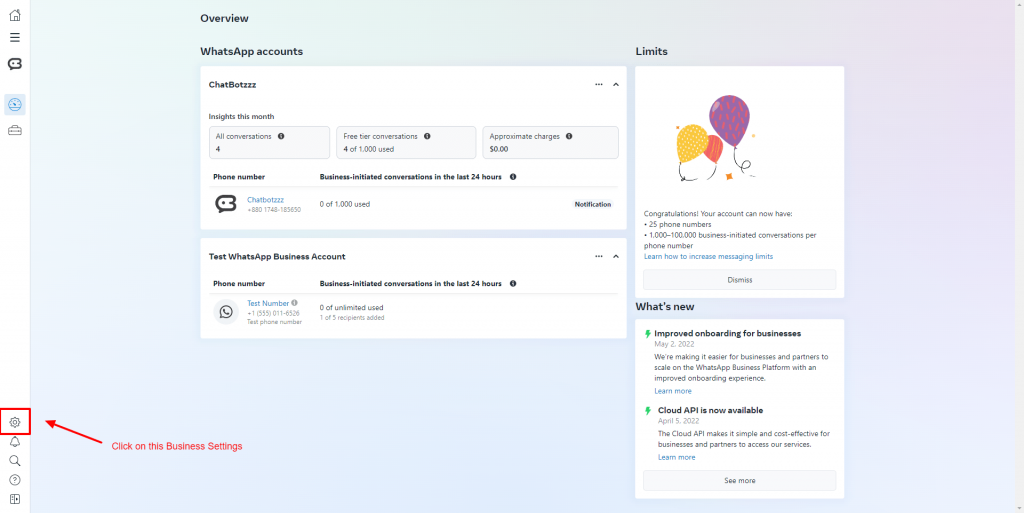
It will redirect you to the business.facebook.com. From there click on the settings.
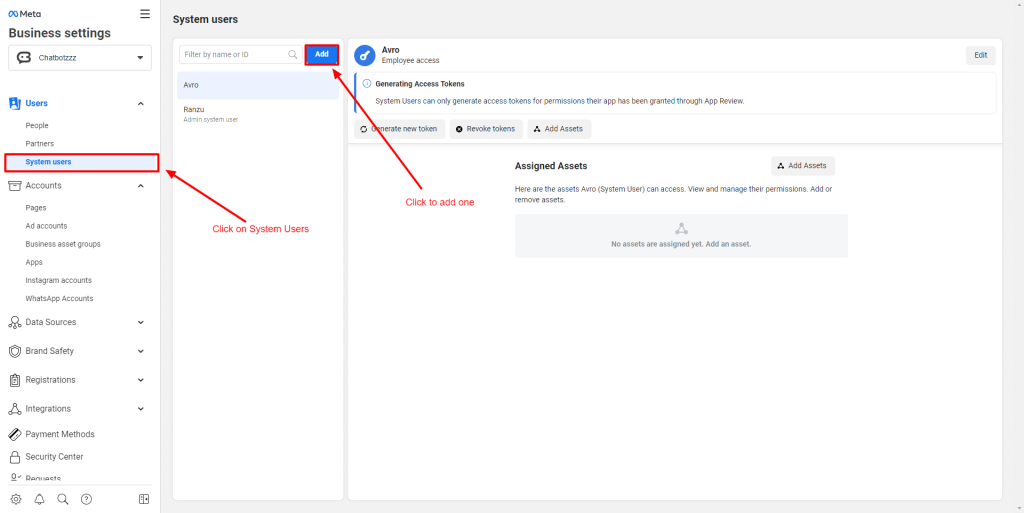
After that click on System users under the menu Users. If you already have users then you can see them. If you don’t have any then click on the “Add” Button to add a user. To add user give a name and select the rule for this business.
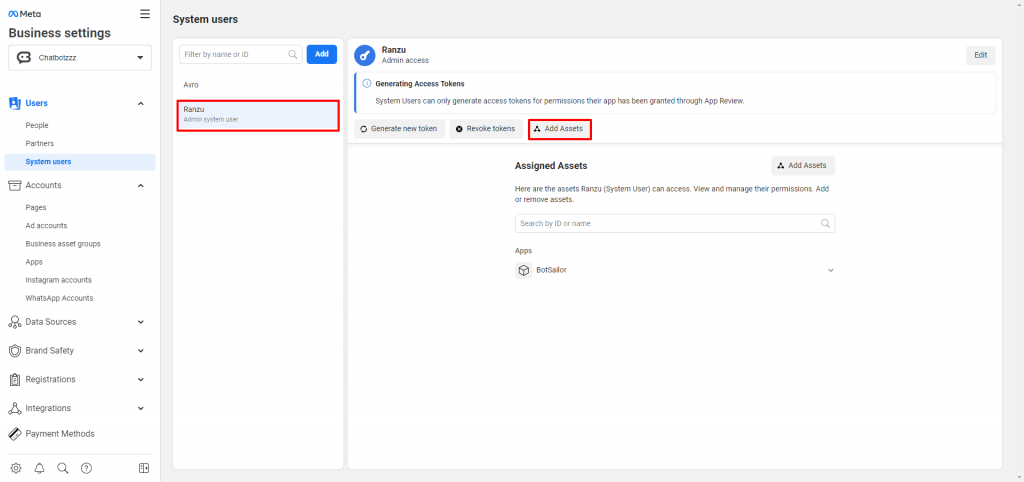
After adding the user, just select the user and click on “Add Asset” button.
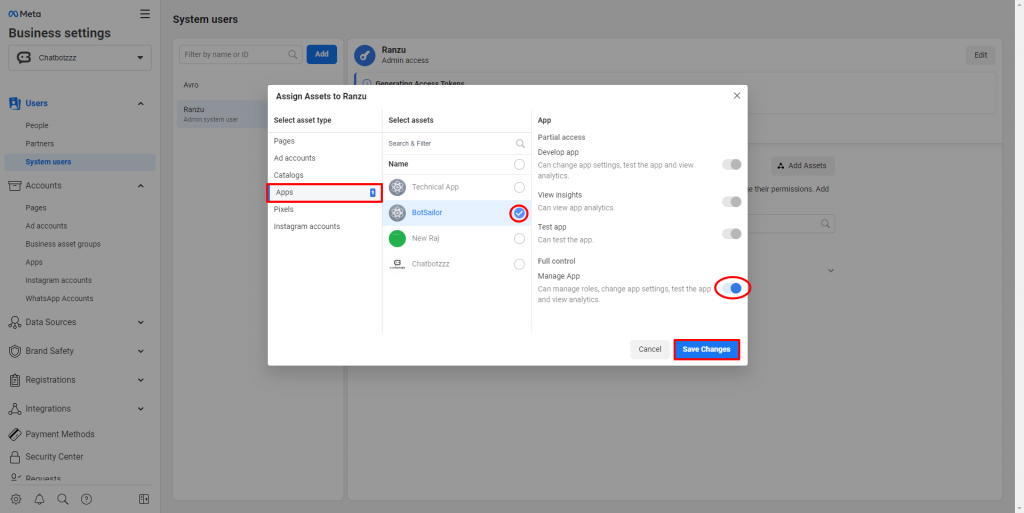
Select App, then tick mark on the app we had created at the beginning of the process. And then allow full control. Then Save it.
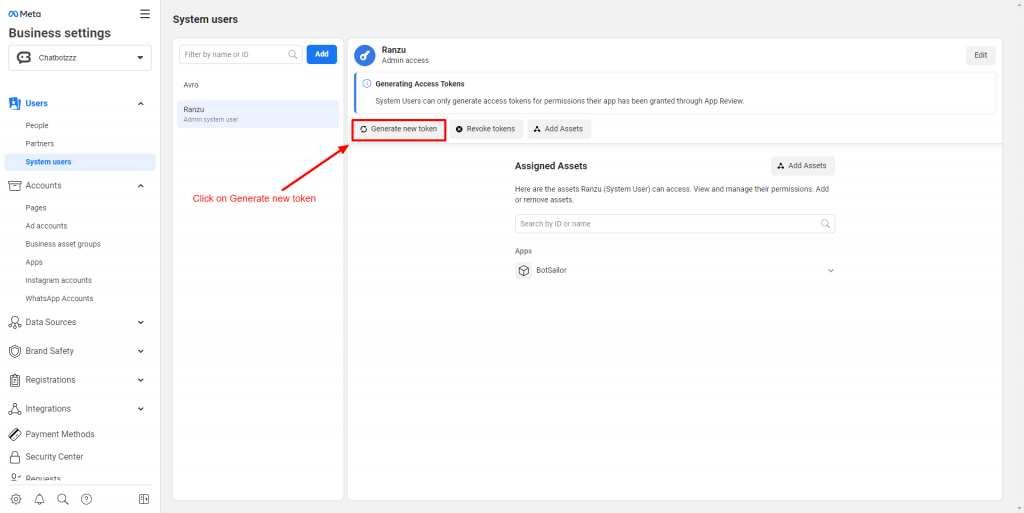
After saving, just click on the “Generate new token”
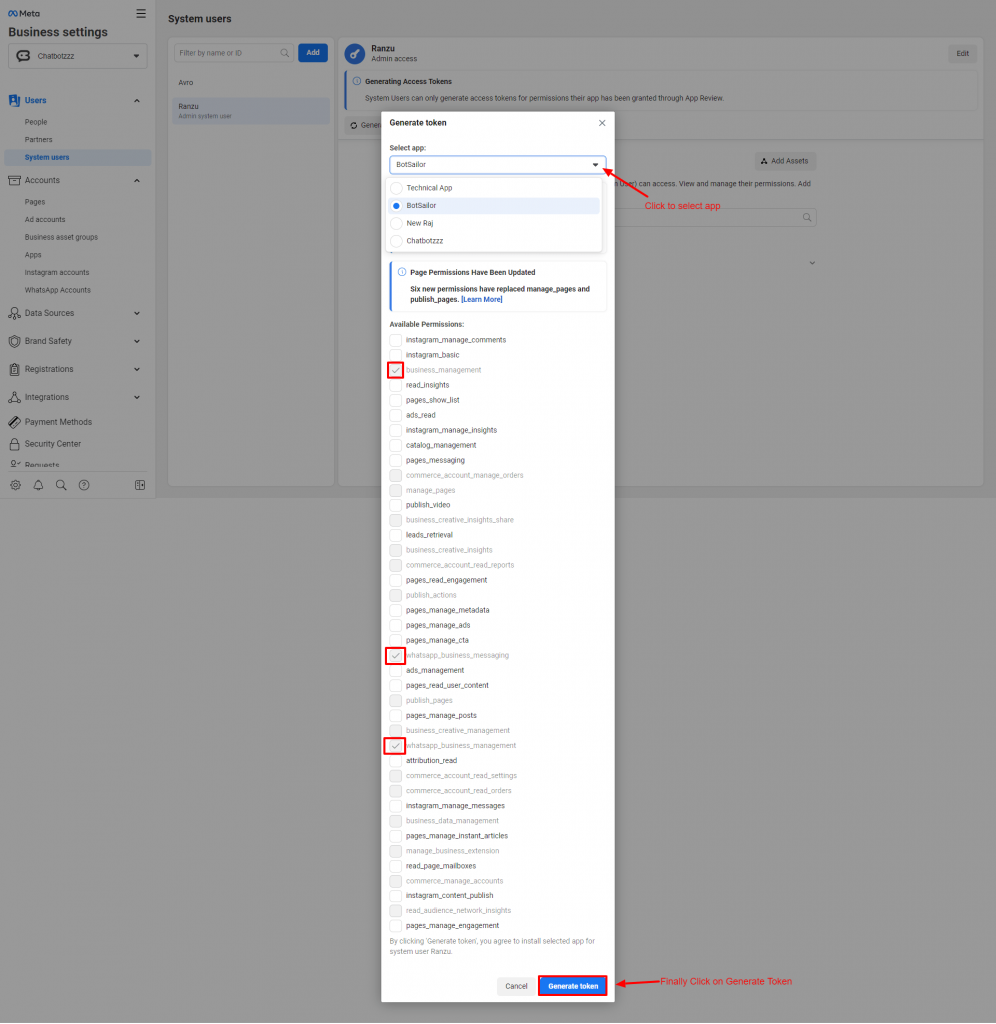
Select the app from the list and tick mark on “Business_management”, “WhatsApp_business_messaging”, and “WhatsApp_business_management”, and finally click on Generate token.
Copy the Access token.
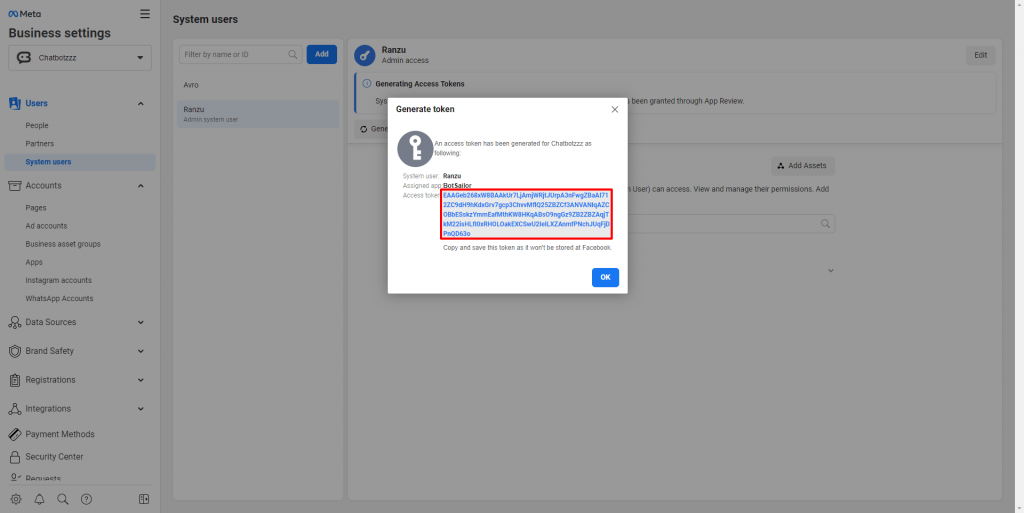
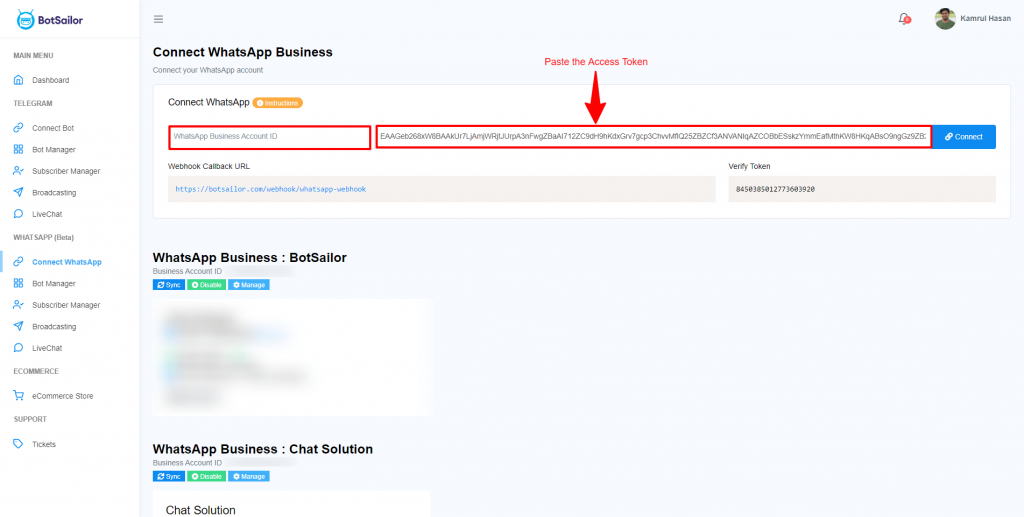
We need this access token to add this WhatsApp business. Now, we will add this access token on BotSailor. Let’s get back to the Botsailor’s dashboard and click on “Connect WhatsApp”. Put the copied access token on the Access token field. We will also need the “WhatsApp Business Account ID”.
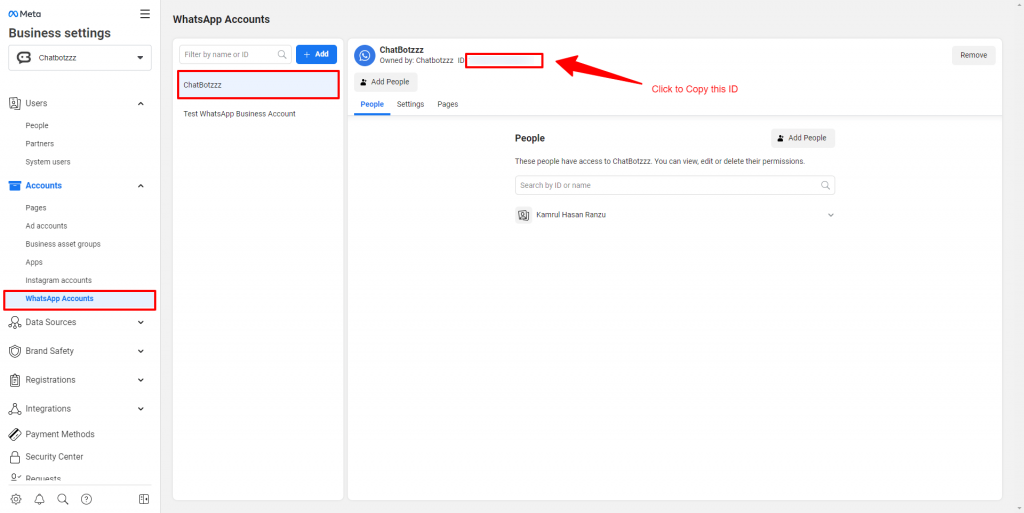
To get the “WhatsApp Business Account ID” we need to go back to business.facebook.com again. From there click on the “WhatsApp Accounts”. Select the WhatsApp Business account and then copy the Business account id.
Now, just paste this number to BotSailor and Click connect.
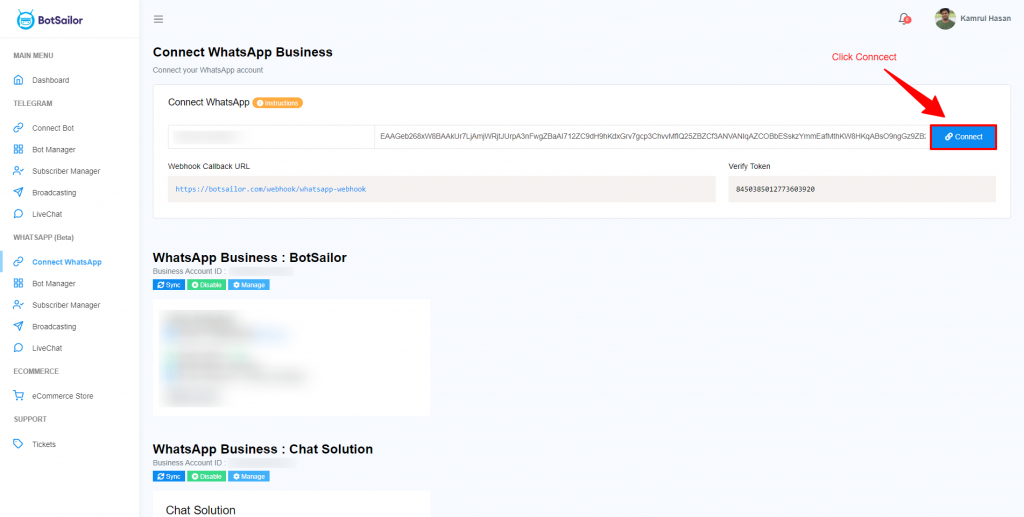
Now, this WhatsApp Business account should be added to BotSailor.
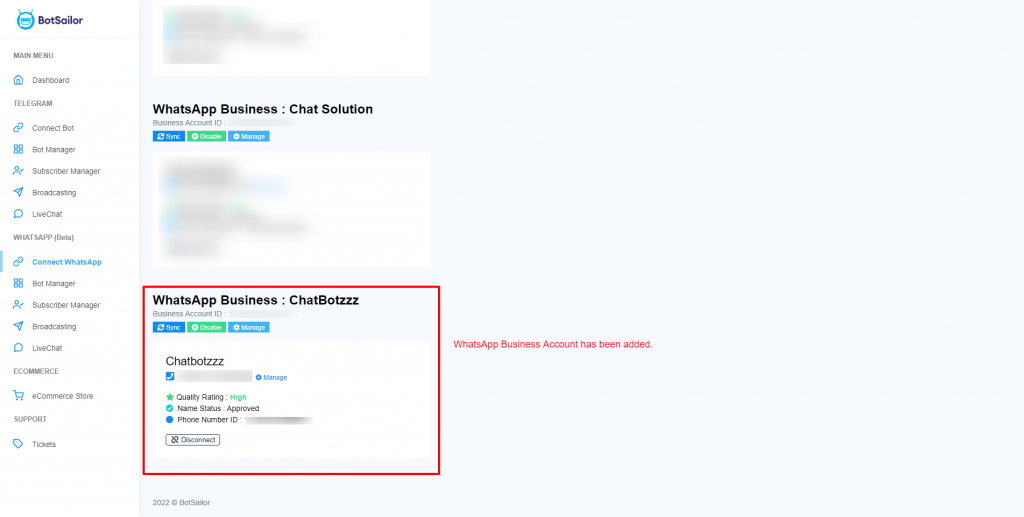
Now, we are ready to explore the BotSailor’s WhatApp Bot Builder.
This is how we can create the WhatsApp Cloud API and add it to BotSailor to create bots, broadcast messages to subscribers, sell products inside WhatsApp, and many more.
